Category Archives: PvP Playbook

Resurrection Vectors in Strand of the Ancients and the Problem of South Graveyard

Strand of the Ancients is a battleground dominated by demolishers and walls. The core object of the map is to break through a series of gates and capture the Titan Relic at the south end of the map. Each side takes turns attacking and defending, with the fastest time winning the battle. Since speed is so important, using the demolishers to take down the gates quickly is a key component of any strategy. You can take down a gate with the bombs littered around the beach (takes about 10-12 bombs), but it is much slower than taking a pack of demolishers through.

Speed and demolishers are the key to Strand, and they create a truly unique situation for the resurrection vectors in this BG – namely, that there is a graveyard objective which can considerably cripple the offense’s ability to win.

Don’t cap South GY unless you know exactly what you are doing.

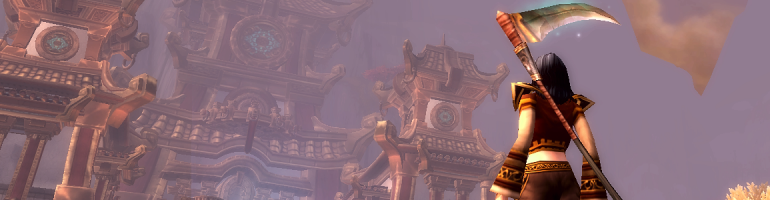
Let’s take a look at the map.

The rules governing resurrection vectors are relatively straightforward; attackers will go to the highest (most southerly) graveyard they control, while defenders will fall back to the highest defensible point. Once taken by the offense, a graveyard cannot be retaken.

The above map shows the initial rez vectors with the Horde on offense. When the Horde is on the beach and has not knocked down any gates, they will continue to resurrect on the beach. Alliance defenders will resurrect back at the workshops, behind the gates, though the flags which control the graveyards are on the opposite side of the path.

Once the first set of gates is breached, the Horde should concentrate on taking the East and West Graveyards. Not only will this change their resurrection vector to the workshop level, but it will make the workshop’s demolishers available to your team. This is critically important because as the Horde moves south on offense, it will take longer and longer to drive demolishers up to the relevant gates. Having demolishers available right outside Green and Blue gates is much faster than having to run back down to the beach to get one.

Remember, speed is really important here.

As the Horde offensive progresses, Alliance casualties will be sent back to progressively higher levels – first E/W, then South, then the Courtyard. It’s possible to skip a level by dying on the beach and resurrecting in the South GY – but unlike the offense, defenders can use the teleporters by each gate to achieve the same result.  Tying up their team down on the beach is often a good tactic, but not if demolishers are rolling up to Yellow unopposed.

This brings up the problem of South Graveyard.

WHY SOUTH GRAVEYARD IS A TRAP

The South Graveyard is a trap for the offense in Strand of the Ancients. Taking it puts the offense at a disadvantage entirely because of resurrection vectors.

When South Graveyard is held by the defense, the following conditions prevail:

  1. Offense rez vectors are to the workshops, next to the demolishers.
  2. Casualties are able to grab a demolisher at the Workshop and bring it up to Yellow gate in about 25 seconds.
  3. If no demolishers are available at the Workshop, players can retrieve demolishers from the Docks for an additional 50 seconds.

Let me illustrate this scenario using our battle from above. Horde is attacking.

Leaving South GY ensures a constant stream of demolishers to replace any which are destroyed assaulting the Yellow Gate or the Titan Chamber.

If the Horde takes South GY, however, the situation changes drastically with respect to the demolishers.

By taking South GY, the Horde casualties will spawn just outside Yellow Gate. This would be great if no vehicles were involved; having a close respawn point helps turn the tide in many battles.

But vehicles are involved, and they’re now much further away in time and in distance.  25 seconds to run to the West Workshop, and about 35 seconds (best case, not counting getting slowed by the defense) to get to the East Workshop. Then it’s another 25-30 seconds to get back up the hill to Yellow. Taking South GY doubles the amount of time to bring demolishers into play.

The demolishers on the beach become effectively unreachable when South GY is taken. It’s now nearly two minutes to get one of them back to Yellow, which at the later stages of the battleground is an eternity. Taking South GY effectively halves the number of demolishers you can use.

It’s really hard to get people to not take an undefended flag. They see a flag, they cap it, normally this is laudable behavior. It’s hard to get people to see that it’s actually changing the resurrection vectors away from the demolishers and why it’s better to leave it alone.

But it is. Leave South GY alone.

The only time taking South Graveyard conveys an advantage to the offense is when all walls are down, including the final one to the Titan Relic. Only at this point in the battle do the demolishers become less important than people reinforcements. At this point you want all hands on deck up at the courtyard, and having the South GY is now advantageous.

But the scenario of breaking down the wall yet not taking it is pretty rare.

Leave South GY alone on offense.

OFF-CENTER SOUTH GRAVEYARD

The other curious thing about South GY is that it’s off-center. The flag has a central location, but the actual rez point is on the west side, closer to Purple than Red. This location has tactical ramifications for both sides.

In general, weak-side attacks from the East (Blue/Red Gates) will fare a little bit better than those from the West, all other things being equal. The demolishers have a clear path to the gate, their escorts can establish a buffer around them in the middle, and defensive casualties will be sent a little ways away from the action.

Strong side attacks from the West (Green/Purple) have to go through the spawn point, which can sometimes lead to rez waves appearing right on top of them:

In this example, if the Horde can get their demolishers past the South GY, Alliance casualties will get sent behind them, making it a little easier to get by. But the Alliance defense will be stronger on the West side because of the graveyard proximity and resurrection vectors.

(Don’t use this as an excuse to cap South GY. Just don’t.)

This off-center location can be used to the offense’s advantage, especially later on when Red and Purple are both down. By concentrating attacks on the strong side, the Horde can draw Alliance attention and focus to the demos on the West, while sneaking demos in from the East.

Good defenders will be aware of this trick, call out incs, and not get pulled too far down towards Purple. They’ll also hold back forces, choosing to concentrate near the front of Yellow instead of down past the trees and ridges. A spread defense is preferred to a concentrated defense here – stacking your whole team on either side is rarely a wise choice on defense.

(Letting the offense take South GY uncontested, however, is almost always a wise defensive strategy.)

Good luck!

18 Comments

Filed under Cynwise's Warcraft Manual, PvP Playbook

Resurrection Vectors in Arathi Basin

Arathi Basin provides a dynamic set of resurrection vectors. Bases can and will change hands throughout the fight, causing troops to scatter across the map in ways you’ll just have to adapt to. Unlike Warsong Gulch, it’s practically impossible to base an Arathi Basin strategy around Rez vectors. They are something to consider, to be sure, but are nowhere near as strategically important as in some other battlegrounds. You are better served by having a solid team which can take a flag quickly than try to engage in a protracted battle to force a rez vector.

That said, there’s one tactic which takes advantage of rez vectors in Arathi Basin – disrupting the initial flow of the battle and sending the opponent back to their spawn point. The spawn points (Trollbane Hall, Defiler’s Den) are substantially inferior graveyards in AB for two reasons:

  1. There’s only one exit, not two, making it easier to farm.
  2. They’re away from a node, so rez waves are not contributing to any flag’s defense.

The spawn points are bad places to be, so forcing your opponents there is good. If you can divide the other team so that some of them are resurrecting at the spawn point, while others are on the field of battle, you weaken them considerably. Whoever gets sent to the spawn point is effectively removed from the field of play for a minute or so, and their ability to influence events is curtailed dramatically.

Arathi Basin can be somewhat complicated to map out, so I’m going to use a sequence of topological maps to outline how this happens. The arrows do not represent movement, they represent resurrection vectors – where players should go if they happen to die.

In this scenario, the Alliance begins by sending 1 to ST, 7 to LM, 5 to BS, and 2 to Farm. The Horde sends 8 to BS, 3 to LM, 3 to GM, and 1 to FM.

The very first phase shows the Stables and Farm under assault but not yet captured. All resurrection vectors are pointing back to the spawn points; no matter how far away people are when they die, they will go back to their side of the map.

The skirmishes shape up to be:

  • ST, FM, GM, uncontested. Farm has 2 incoming.
  • BS: 8 Horde, 5 Alliance.
  • LM: 7 Alliance, 3 Horde.

We will assume, for the moment, that numbers prevail. This is not always a safe assumption, but this is Xs and Os.

This early stage is always so interesting to me because everything happens so fast as flags are assaulted. There will be casualties, but how many and from where is always totally up in the air. Stables and Farm are ticking but haven’t flipped as LM, GM and BS get assaulted, so all casualties go back to the spawn points.

The key to watch is Farm in this example. If the Alliance outriders can take it from the defender, they disrupt the graveyard flow of the Horde. It’s actually really important to hold ST and FM long enough to provide your team with a decent graveyard!

Let’s assume they succeed – no small assumption, I know – and see what happens.

Let’s assume total casualty rates at each base for the losing side, and some losses for the victorious side. The Horde at LM, FM and Alliance at BS are sent back to the spawn points. This is numerically worse for the Alliance (they lost more at BS) but they hold the strategic advantage at the Farm.

All rez vectors are still plausibly pointing back to the spawn points, but ST is about to flip.

Horde sends 2 from BS to ST. Alliance sends 3 from LM to reinforce FM.

Here’s where it starts getting interesting. I’m going to focus just on a few of the Horde rez vectors here, because once ST flips the blue team will all go there.

The Horde attacking ST are going to be in trouble. They are going to meet the rez wave coming out of Trollbane Hall and get steamrolled – but because there are no red graveyards yet, they’ll go all the way back across the map.

The Iron Triangle junction between LM, BS and FM is another place to watch. Farm will be under attack, there will be a lot of attention on it from the Horde. BS will split its defense, sending 2. The rez wave will come at it from the other side.

If the Alliance is smart or bloodthirsty, LM will send most of its troops to Farm to counter the BS reinforcements.

The key to notice is that the Horde is still sending all casualties away from a defensible node in this scenario.

Here’s the map about 30 seconds later, or around 1:45-2:00 into the battle. The second tier of nodes convert and the Horde finally gets some graveyards on the map.

The problem is now that they’re split across the map at the Farm. Almost half of their team has rez vectors pointing to the Defiler’s Den, while the rest are pointing to BS or GM. If the Alliance meets the rez wave on the GY side of Farm, they’ll keep sending the Horde back to the spawn point. The BS flag is pretty far away from the Farm, so the Horde really need to be near the Iron Triangle junction to be sent back to BS.

And if they do that, chances are pretty high that they’re not fighting at the flag, they’re fighting in the road.

This is a bad situation. If you are attacking from BS and get too close to the flag (like you should) but fail, you’ll get sent to the corner of the map to the spawn point. In that case more of your team will be moving out of the effective field of play to the edges, weakening BS further and further.

I see this split a lot. A fast counterassault on the Stables or Farm can really throw off a team’s rhythm and they won’t even know why – they just know that people aren’t getting the job done, that Farm/Stables is a problem point, can’t someone please take a base?

The split can be overcome, but it’s not easy. The people who got sent to the spawn points might have died because of overwhelming numbers, but they might also have died from getting outmatched. The attack vector out of the gate is somewhat weak (no cover, highly visible approach, easy for defenders to engage away from the flag.)  There are times that being in the spawn point can work in your favor – if you have 3 people repeatedly rezzing there, and 5-8 opponents holding the node, those 3 players are creating a statistical imbalance elsewhere on the map by getting farmed.

This goes back to one of the important points about Arathi Basin – you have to win the individual matchups. AB rewards pure PvP play all over the map. If your team can’t take a base with a 1:1 matchup, then they’re going to lose no matter what kind of strategy you have.

FIGHTING IN THE ROAD

It happens to all of us. Sometimes you get jumped, sometimes you are trying to defend something, sometimes you just see red and stop thinking, and then … you’re fighting in the road.

Away from a base, away from a flag.

Keep in mind that fighting in the road can be a viable defensive strategy under the right conditions. If others are holding the base and staying at the flag, then killing the enemy out in the road doesn’t pose much risk, and your own death should put you back at the base in a reasonable amount of time to help defend. The attackers are intercepted well away from the flag and have no opportunity to assault the base.

However, for attackers it’s a pretty bad idea. You’ll get sent back to a base you control, you’re nowhere near the flag, and even if you defeat this defender, they’re going to show back up in 30 seconds at the base you’re assaulting.

Avoid it if you can on offense; the rez vectors don’t favor you.

Fight at the flag, instead.

11 Comments

Filed under Cynwise's Warcraft Manual, PvP Playbook

Tactical Graveyard Control at Arathi Basin Nodes

This is the second post in my series on resurrection vectors and graveyard controls in Warcraft’s battlegrounds. I should just go ahead and admit that this is going to be a series; it is. I don’t have a catchy name for it yet, but why wait for a title? Let’s just dive right on in and talk about Arathi Basin.

The resurrection vectors of Arathi Basin are to the nearest controlled graveyard, including the original spawn point. These vectors have tactical implications for skirmishes at individual nodes and strategic importance when dealing with troop movement. In this post I’ll focus on the tactics at each node; we’ll talk about the Iron Triangle in the next one.

Control of the node’s flag gives your team control of the node’s graveyard. Each node starts off uncontrolled, but clicking on the flag assaults the base, turning the flag grey. The graveyards come into play one minute after the initial assault, when the node is captured and the flag turns blue or red. From this point on, they work like a standard graveyard with rez waves at the spirit healer.

Each node’s flags are on the other side of some object or building preventing the resurrection wave from knowing exactly what is happening at the flag while dead, and requiring them to run around the obstacle to get to the flag. There are thus two components to the local rez vector that have to be considered:

  • Casualties/reinforcements are blind to the situation at the flag; they don’t know if someone is assaulting it or not.
  • Defenders will always have at least two routes to return to the flag1. The route chosen will determine how quickly they get it back in sight, as well as which side of the offense they can attack.

Because defenders have to run a route to get back in sight of the flag, attackers have  additional time to allow attackers to assault the base. These lines of sight are important!

The above diagram is a general representation of each node. You might have to flip the orientation a bit, or change the building shape and add in chickens or undead horses or something, but it’ll suffice for a discussion on graveyard control. The routes aren’t equal length to run, but it’s more important to get to where you can disrupt the attackers than necessarily get back to the flag.

From a tactical standpoint, the ideal placement for defense is near the flag to prevent capture, no matter where the attack comes from. Fight at the flag! is the rallying cry of introductory battleground manuals everywhere, but the real tactic is:

  1. Establish a buffer zone between the flag and the attackers. Engage them away from the flag to deny them opportunities to assault the base.
  2. Position so rez waves reinforce the flag first.

Creating this zone of control is important and takes practice. You don’t want to stack on top of the flag, but you don’t want to be too far away from it. Teams should get used to moving forward and engaging the enemy away from the flag without getting pulled off it.2

Furthermore, the direction reinforcements come will either help or hinder your flag defense. Having rez waves passing by the flag to get back into combat is far safer than having them never see the flag.

Let’s take a look at a flag-side assault.

Attacks on the flag side of the node generally put the defenders in a good position. They are able to watch the flag and have a few people cluster near it while sending DPS off to meet the assault at a moderate distance. Lines of sight are usually pretty clear on both sides, and rez waves know which direction they need to be heading to get to either the flag or to battle quickly.

Flag-side assaults are often slugfests and death matches.

A more interesting tactic is to assault the graveyard side directly, with the intent to both pull defenders away from the flag and neutralize rez waves quickly.

Attackers can (and should) use the resurrection vector at the node to their advantage by drawing defenders into this kind of fight. Pushing towards the graveyard:

  • Blocks line of sight to the flag for many defenders
  • Focuses attention away from the flag
  • Allows attacks on newly-resurrected characters, when they are unbuffed and unprepared

Establishing this kind of control allows attackers to really use the rez vector of the node against the defense. Remember, the whole point of using rez vectors is to send your opponents where they don’t want to be, where they will be ineffective. Hitting the GY side allows you do shift all defenders away from the flag.

Shifting defenders away from the flag means you’ve opened up the Ninja Zone. The reason that people like me yell FIGHT AT THE FLAG! so much is because if you’re not near the flag, not looking at the flag, not remembering that the flag is the really really most super important part of the entire node, then it’s open for the enemy to take. Ninja: doesn’t need to be a rogue! 

One thing I like about Arathi Basin is how the resurrection vectors don’t dictate the entire battleground’s strategy. There are a lot of different ways to take a base. There are a lot of responses to which route you should take in which situation, depending on your class, role, and the position of your opponents. It’s not wrong to assault flag-side! There are plenty of ways that it can work – one of my favorite strategies is “ride in and kill everyone in sight, take the node before they rez.” Another one is “hit defenders with CC chains while standing/healing at the flag, click it often, steal the node while the defenders are still alive.”

But I also like that I have to ask questions like: where are the reinforcements going to come from? How long do I have before the next rez wave arrives? Am I getting pulled off the flag? Is it worth it to get pulled off a little bit?

I think it’s interesting how the answers change from battle to battle, from skirmish to skirmish.

Next time, I’ll zoom out a bit and look at the strategic uses of rez vectors and graveyard control in Arathi Basin.

—-

(1) Even the Gold Mine allows two ways to return to combat – the path down the mine, and the path to the mine roof. GM suffers a bit in that the second route doesn’t put you on a radically different attack vector; ideally, you could turn right after leaving the graveyard and approach the flag from the Stables side.    

(2) In an earlier post, PvP Playbook: Pulling Defenders Off Flags, I talked about how you can pull defenders off a flag just by letting them engage you at maximum distance – basically goading defenders to fight in the road. Don’t be that defender.

15 Comments

Filed under Cynwise's Warcraft Manual, PvP Playbook

Resurrection Vectors and Graveyard Control in Warsong Gulch

Character death and resurrection vectors are key strategic elements of Warcraft’s Battlegrounds; unlike the Arena deathmatch format, battleground combatants can and will die multiple times throughout the course of a match.

Death in a battleground is like being sent to a penalty box. Characters are removed from their present position, placed somewhere else on the map, and then prevented from rejoining their team for a set period of time. It’s possible for a teammate to put someone back on the map where they were through a resurrection spell, but once in the penalty box, the character’s new location is permanent.1

I call this movement of players across the map through death and rebirth their resurrection vector. Understanding these vectors is essential to understanding the overall strategy of a battleground.

WHERE DO WE GO WHEN WE DIE?

Where characters go when they die in a battleground is not a metaphysical question; they go to the graveyard to be resurrected by a Spirit Healer in 30 seconds or less. This brief visit to the afterworld is often punctuated by the cries of the fellow damned bemoaning their fate and lack of heals or peels2, but – aside from this cacophony in /bg – our hero’s katabasis is brief and uneventful. Thirty seconds to reflect on your situation, check the map, and then it’s back to work again.

Because death only temporarily removes characters from play in battlegrounds, resurrection vectors are really the primary weapon in disrupting your opponent’s plans while achieving the goals of the match. Knowing where you and your opponents will end up dictates the answers to strategic decisions like:

  1. Which graveyards should we seek to control, and which should we ignore?
  2. Where is the best place to engage the enemy?
  3. Where should our forces go next?

Each battleground has unique resurrection vectors. Some maps have very logical vectors and symmetric graveyards; others are asymmetric or follow nonstandard rules designed to balance Rated PvP.

One constant is that Spirit Healers resurrect in waves based on a timer. Every 30 seconds a graveyard could potentially spit out multiple reinforcements for a given area. These resurrection waves can turn the tide of a specific battle – or get destroyed by a well-organized graveyard camp.

While the general principle is easy to understand, each battleground is unique and requires individual evaluation. Over the next few posts I’ll be going over specific resurrection vectors in different battlegrounds, using topological maps to illustrate how they can be used to your team’s advantage.

Let’s start with the most zen of all battlegrounds – a little conflict in Ashenvale and the North Barrens that we like to call…

WARSONG GULCH

Warsong Gulch has the simplest map of resurrection vectors because each side has only one graveyard.

No matter where someone dies on the map, they go to their team’s graveyard.

There are several important strategic facts about the WSG graveyard to consider:

  1. The graveyard placement is symmetrical for each faction.
  2. The graveyard is on the stage right side of the map. (From the home base of each faction looking out over midfield, it will be to the right.) This means that resurrection waves are going to reinforce that side first and stage left (ramp) last.
  3. The graveyard is much closer to the home base of each faction than to their opponent’s base.
  4. The graveyard was changed in patch 4.1 to only allow characters to only allow exits onto midfield. They cannot run back directly to the base, the ramp area, or even the ledge above the graveyard without some kind of assistance.
  5. Characters in the graveyard can be attacked from above and below. There is no immunity from camping.

Some of the strategies we can derive from the resurrection vectors are obvious. Defenders have the edge in their base because reinforcements will arrive quicker than the offense, Flag Carriers should favor runs down the Ramp over going straight through the Graveyard.

I’ve written before on graveyard camping in Warsong Gulch and how it is, sadly, strategically sound. Looking at the resurrection vectors gives you an understanding of why it’s so effective:

You see how pressuring the graveyard opens up half the map for the FC to run unimpeded? That is why graveyard camping works. Pushing the offensive control zone (the blue slanted lines) towards the enemy graveyard means that when opponents die, they are sent into a situation where their movement is restricted. They have to break the blockade before they can do anything about the FC, by which time it’s usually too late.

The single graveyard of WSG creates a resurrection bottleneck that rewards camping. You don’t have to camp the graveyard per se, but setting up a strong line of offense at midfield and pushing it towards the graveyard:

  1. Establishes a zone for the FC to run.
  2. Removes the opponent’s ability to reinforce their offense.
  3. Eventually removes their ability to establish an offense.

Establishing and maintaining that blockade zone around the graveyard establishes control of the map. Even if a few opponents get by, they will face poor odds isolated from their teammates, and their resurrection vector sends them right back into the blockade.

Next time, we’ll look at a more complicated set of rez vectors: the shifting graveyards of Arathi Basin.

—-

(1) Admittedly, it’s not an entirely permanent relocation. Corpse Running in Battlegrounds describes how running back to your corpse can screw up resurrection vectors, and is sometimes the difference between keeping or losing a node.  

(2) “First to complain, least skilled. No exceptions.” Dusk of Uldum, How to BG, 2009.

16 Comments

Filed under Cynwise's Warcraft Manual, PvP Playbook

PvP Playbook: Portrait Psychology

Your character portrait conveys useful information about your character to opponents in PvP. You can’t prevent this exchange of information – but you can use your portrait to wage psychological warfare on your enemies.

WHAT YOUR HELM SAYS ABOUT YOU

Consider what information is given when you target someone in the default UI: race, gender, resource type.

Human, female, uses mana.

Most players will turn on either numbers (my personal preference) or percentages:

The portrait also conveys one really important piece of information: gear level.

Your helm gives your opponents a clue about your overall gear level in PvP.

See, PvP gear in Cataclysm was standardized so you can approximate a character’s gear level by their health, regardless of class. (It’s been a good change, honestly.) So if you have numbers on, you can tell at a glance how geared they are.

It’s important to note that not everyone has numbers turned on, and those who do may not know what the levels are. In the heat of battle they may not bother to look at all. The character portrait, though, is a big tell about gear – if they are showing a Conquest PvP helm, their gear is likely at least decent if not great. If they’re showing a crafted PvP helm, or a PvE helm, chances are pretty good that they’re undergeared or not fully geared for PvP.

Now that we have Transmogrification, we can use this to our advantage.

MAKE THEM UNDERESTIMATE YOU

One of my favorite psychological games to play with portraits is to dress so I look weaker than I really am.

Looking weaker than you are won’t fake out experienced PvPers (who will look at your health, not your helm), but mogging your PvP gear to the distinctive crafted starter sets can cause many opponents to initially underestimate you.

While the visual appearance of gear isn’t everything, force opponents to look closer to see your gear level! Giving the wrong initial impression is tactically sound. If they think that you’re poorly geared and an easy kill when you’re not – great! If they think you’re geared improperly – like a Warlock in Spirit gear, or in PvE gear – even better.

The helm is just the start of your deception, of course. Mog your whole PvP set to a distinctive yet plausible lower tier to give the wrong impression.  (I’m lucky that I play a cloth-wearer, because the crafted PvP sets look pretty good.)

This option works best when your gear is good to great. If your gear really is bad, though, you’ll want the next option.

GIVE NOTHING AWAY

This is my default mode of operation – hide your helm in PvP. Doing so means my portrait doesn’t give away anything about my gear, which is good.

It also allows me to show off my character’s hair, which is a plus. And it tells nothing about my gear.

But it’s also wasting an opportunity to deceive opponents. When I started out my PvP gear grind this season this probably wasn’t a bad thing – hide your weakness – but now that I’m respectably geared I don’t know that I need to maintain a blank slate with my portrait.

Extending this to the whole body, I try to transmog my starter PvP gear and Honor PvP gear into something else entirely different – an old vanilla set of greens, crafted Mageweave or Netherweave sets, old Northrend PvP tiers – anything to hide that you’re not quite as geared as you’re going to be.

This tactic is best used while gearing up.

CONFUSE THEM

Noggenfogger Elixir has been a PvP standby for years. Furbolg form, Gnome/troll forms, Iron Dwarfs, Wolvar – whatever kind of disguise you’ve got, you can use. This isn’t about mogging your helm so much as it is completely confusing opponents with your portrait and silhouette. The best disguise conceals not only your gear, but your race and even your class. (Name plates will reveal your class, though, and everyone should have name plates on in PvP. No exceptions.)

I think the cross-faction disguises are honestly the best. I remember targeting Horde who looked like night elves in early Cataclysm – or goblins before goblins were a playable race – and wondering how the hell they had done it. It was a great tactic, because every time I targeted a night elf I thought I’d misclicked and gotten a friendly unit.

BE DISTINCTIVE

Sometimes you want to intimidate your opponents. You’re in full Conquest gear and rolling with your arena team mates? Show it. Don’t mind being singled out in the battleground? Wear something distinctive on your head. Engineering is great for this, with Deep Dive Helmets and goggles galore, but there are plenty of distinctive helms which will let people know that yes, they’ve got YOU in their sights.

Intimidation isn’t a bad thing in PvP. If you look at someone and immediately identify that they’re in a full set of Conquest gear while your team is a mix of crafted and Honor, you’re going to treat that player with wary respect. (Hopefully, you’ll also focus fire them; even more hopefully, you’ll focus fire them only when appropriate, and not while allowing their teammates to win the BG.)

I’ve recently hit a PvP gear level where I feel comfortable adopting this tactic again. The warlock Conquest helm is really great looking – first PvP one I can say that about since the Wrathful helm – and the outfit is killer. I don’t mind advertising that my warlock is in a lot of Cataclysmic gear, since if I get focused that usually means a healer or FC isn’t.

Adopting a unique, distinctive look can have its drawbacks, though. I’m using the Flying Tiger Goggles, an early engineering schematic, which not only helps opponents quickly identify me, but also gives away my profession. You can use this to your advantage, of course – there are non-Engineer goggles out there to fake out your opponents – but it is a tell that I’ve got bombs available to me.

BE MINDFUL OF YOUR APPEARANCE

I think it’s important to consider how you look to your opponents in PvP. Appearance isn’t anywhere near as important as, say, proper gearing and good solid play, but it’s a detail that you shouldn’t overlook. Much like which title you display, your portrait conveys information about your character and their gear.

Take a few moments to think about how you’ll look to your opponent across the battlefield. Make sure that it matches the impression you want to give.

Little details add up.

26 Comments

Filed under Cynwise's Warcraft Manual, PvP Playbook

PvP Playbook: Pulling Defenders Off Flags

I'm at your flag, stealing your base, because you got pulled away chasing my friends.

Ninja.

In PvE, being called a ninja is a bad thing, but in PvP, ninjas are awesome. Ninjas come in and steal objectives out from underneath the enemy’s noses. They snatch reinforcements away from a node and send them tumbling across the map.

Ninjas are awesome. But they often don’t work alone.

Let’s open up the playbook.

PULLING DEFENDERS OFF FLAGS

Every PvPer needs to learn this one. Unlike the DPS pick, this is one where you need to be able to read the situation at a node and take one of two roles – decoy or ninja.

Let’s start with a quick discussion on flag defense.

Effective flag defense requires defenders to be alert, pay attention to their surroundings, and be aware of several different avenues of potential attack. They have to be aware of their position relative to the flag, and try to make sure that they engage any attackers far enough away from the flag to deny them access to a potential cap, but close enough to interrupt any caps that get through.

My healing druid Cynli is defending the Blacksmith in the above picture. She’s moved out about as far as I’d consider safe and still defending. She could heal any DPS on the road or approach from Farm, but not quite reach the bridge. I’ve outlined the healing range with the green line so you can see it.

The red line represents how far back I can get with Hurricane, my main flag defense tool. I try to keep the flag within view when defending at all times with the camera angle, and have hotkeyed flipping my camera around to the delete button just so I can check behind me if the flag is not in view.

As a solo defender, this is as far as I should ever get away from a flag. Right now I have visibility only to the Farm and some of the LM road – I’m not defending against the GM or ST approaches, and parachutes from LM will probably land behind my field of vision.

Your goal is to draw me even further away.

THE DECOY AND THE NINJA

Every node could be broken down into a map like this one – where is the flag, where is the graveyard, where are the lines of sight?

Most nodes have an obstruction between the flag and the graveyard, and at least two avenues of approach. That’s deliberate – if you can’t see the situation at the flag while waiting to rez, you can’t call it out to your teammates. You might be able to see someone approaching the flag, but not from all approaches.

The goal of this play is to create a distraction away from the flag, so that the defenders leave it outside of their line of sight. This is one of the times where it’s okay to not fight at the flag, but one of the only ones.

The decoys pull the defenders away from the base by making a very obvious approach. They also pause at extreme range to allow defenders a chance to 1) notice them and 2) engage them. When fighting, they pull back a bit instead of going forward.

Once the DPS are pulled away, the healers will likely follow. This is something that personally frustrates me as a healer, watching DPS tunnel vision their targets and going over the BS bridge. They’re out of range, and if I’m the solo defender, the right thing for me to do is stay right where I am.

But sometimes, even a wary defender can get pulled out of position without even realizing it. That’s what a good decoy attack should do. They should be loud, they should be inviting targets, they should look like a credible threat – or healers who have to die.

Whatever bait works, use it.

While the decoys are drawing attention away from the flag, the ninja comes in from the opposite approach. Now, it’s great if you have a stealther who can do this, but it’s not necessary at all. I think a lot of players think that they can’t ninja cap flags if they can’t stealth, and that’s just not true. It is all line of sight. In the above example, a rider coming up from the GM road may be seen from the BS graveyard, but it’s not really all that likely. If you approach from the water or parachute in from LM, you’re completely invisible to the defenders.

Use the buildings. Use the terrain. Check to see that the decoys have pulled the defenders away, and then cap that flag.

The key here is patience and communication. If you see someone on your map coming around behind a node, call out what you are doing – pulling defense off the flag – and tell them to get the flag. If you see someone pulling defense away, go in and grab it. You can even rush in past the decoys and get the flag, but your team has to know that they should switch to snares, slows, and do whatever they can to keep defenders away from you.

Every node is a little different in Arathi Basin, Battle for Gilneas, and even Eye of the Storm. This also applies to towers and bunkers in Alterac Valley, though with restricted lines of sight.

Every class can ninja cap, and every class can serve as a decoy for a ninja. All you have to do is get the defenders focused on one group of you, while another goes in and steals their node out from under them.

Good luck.


30 Comments

Filed under PvP Playbook

Playbook: DPS Midfield Pick

Strategy is the plan to win the battle; tactics are specific techniques used to enact that strategy. You have to have both to win. I’ve talked at length about strategies here on CBM, but less about tactics than I probably should have. Partly this is because tactics tend to be class specific, and also because they tend to be highly situational – sometimes they work, sometimes they don’t, and you have to exercise judgement in knowing when they’re going to apply.

In retrospect, I think that was a bit of a mistake. It’s good having a strategic understanding of each battleground, because then you can make decisions about where you should go next. But it’s also good having a tactical playbook, of having techniques you can use in support of that strategy.

My personal goal is to keep these more focused than many of my strategy posts. Here’s a play, here’s where I think it’s useful, give it a go and see how it works for you. Teams will vary, responses will vary, but hopefully you will find my playbook useful.

THE DPS PICK

Let’s start with something simple, the DPS Pick.

I use this play a lot in WSG, and it’s a tool for a fairly common situation – the FC is unsupported in midfield, a rez wave has just hit, and the enemy is in pursuit of the FC across midfield. I’m playing DPS. What do I do?

I pick the opponents and get the FC to safety.

A pick in sports is when one player runs the opponent covering them into another player. I learned it playing lacrosse, where it’s specifically applied to stationary players, but since Warcraft doesn’t allow collision detection, it’s going to be a little different.

The FC is running for the tunnel entrance. If they’re smart and heads up players, they’ll run right to the GY, but for sake of example let’s say they’re not paying attention and just going straight tunnel.


To set the pick, I get on an intercept course for the FC, angling to pass on the midfield side of him. As a healer, I would head towards the tunnel entrance and try to get ahead of the FC – as DPS, I want to get behind, because that’s where the pursuers are.

My goal is absolutely not to kill the pursuers. My goal is to control and distract them. Every second I can slow them down is good. If I can get them to stop chasing the FC and engage me, that’s even better. I want to be as irritating as I can be so that they think they need to deal with me, instead of chasing after the FC.

On a hunter, I’d try to trap or scattershot. DKs has Chains of Ice and ice cubes, mages have Frost Nova and Polymorph, warlocks have Shadowfury, Fear, and Howl of Terror. Tailors have nets. Engineers have bombs.

Every DPS class has something they can do to stun, slow, fear, or otherwise force the opponents to stop chasing the FC. Don’t open up with attacks – open up with CC. You’re not there to kill them. You’re there to let the FC escape.

Keep up with the CC. While instant fearbombs can be nice, an AoE stun followed by mass fear can be even better – not only will it stop pursuit, but it is guaranteed to piss off the other players and cause them to forget about the FC to focus on you.

And all the while, your FC is running out of midfield, either to the safety of the healers in the base, or directly in for a cap. Once the FC is safely away, or you have their attention, then you can start laying on the damage.

You can use this play in other BGs – Strand of the Ancients, for instance, is prime ground for DPS to pick opponents. There are multiple FCs in SotA, after all – they’re called Demolishers. If Demos are rumbling by a GY where defenders are rezzing, get in there and distract them! Who cares if you die, the FC gets away!

And that’s the whole point of the DPS Pick.

25 Comments

Filed under Cynwise's Battlefield Manual, PvP Playbook